

Creating and Organizing Projects
Create a project for a site, then add scans with their capture dates. Use consistent project names and select the intended workspace before you begin.
Creating a New Project
Watch the video tutorial below, or follow the step-by-step guide.
Preimage Create Project Tutorial
Step-by-step Guide
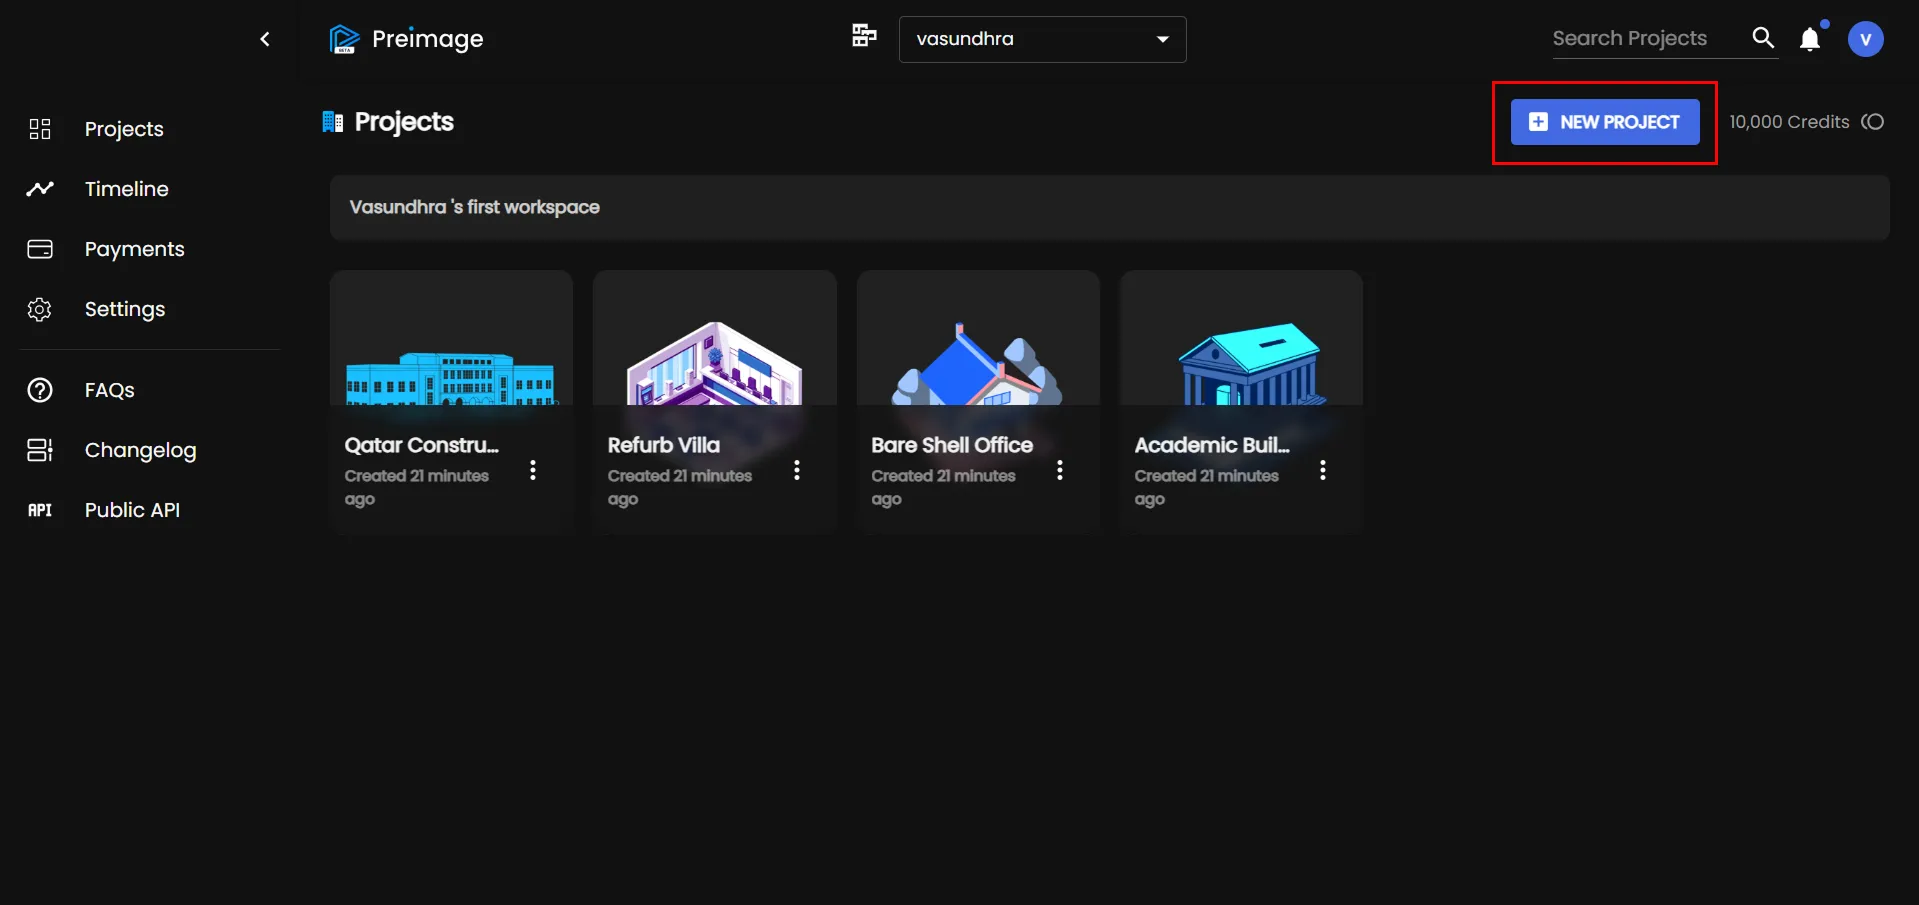
1. Navigate to the “Create Project” screen
-
Click the + New Project button from your dashboard.
2. Fill in the project details
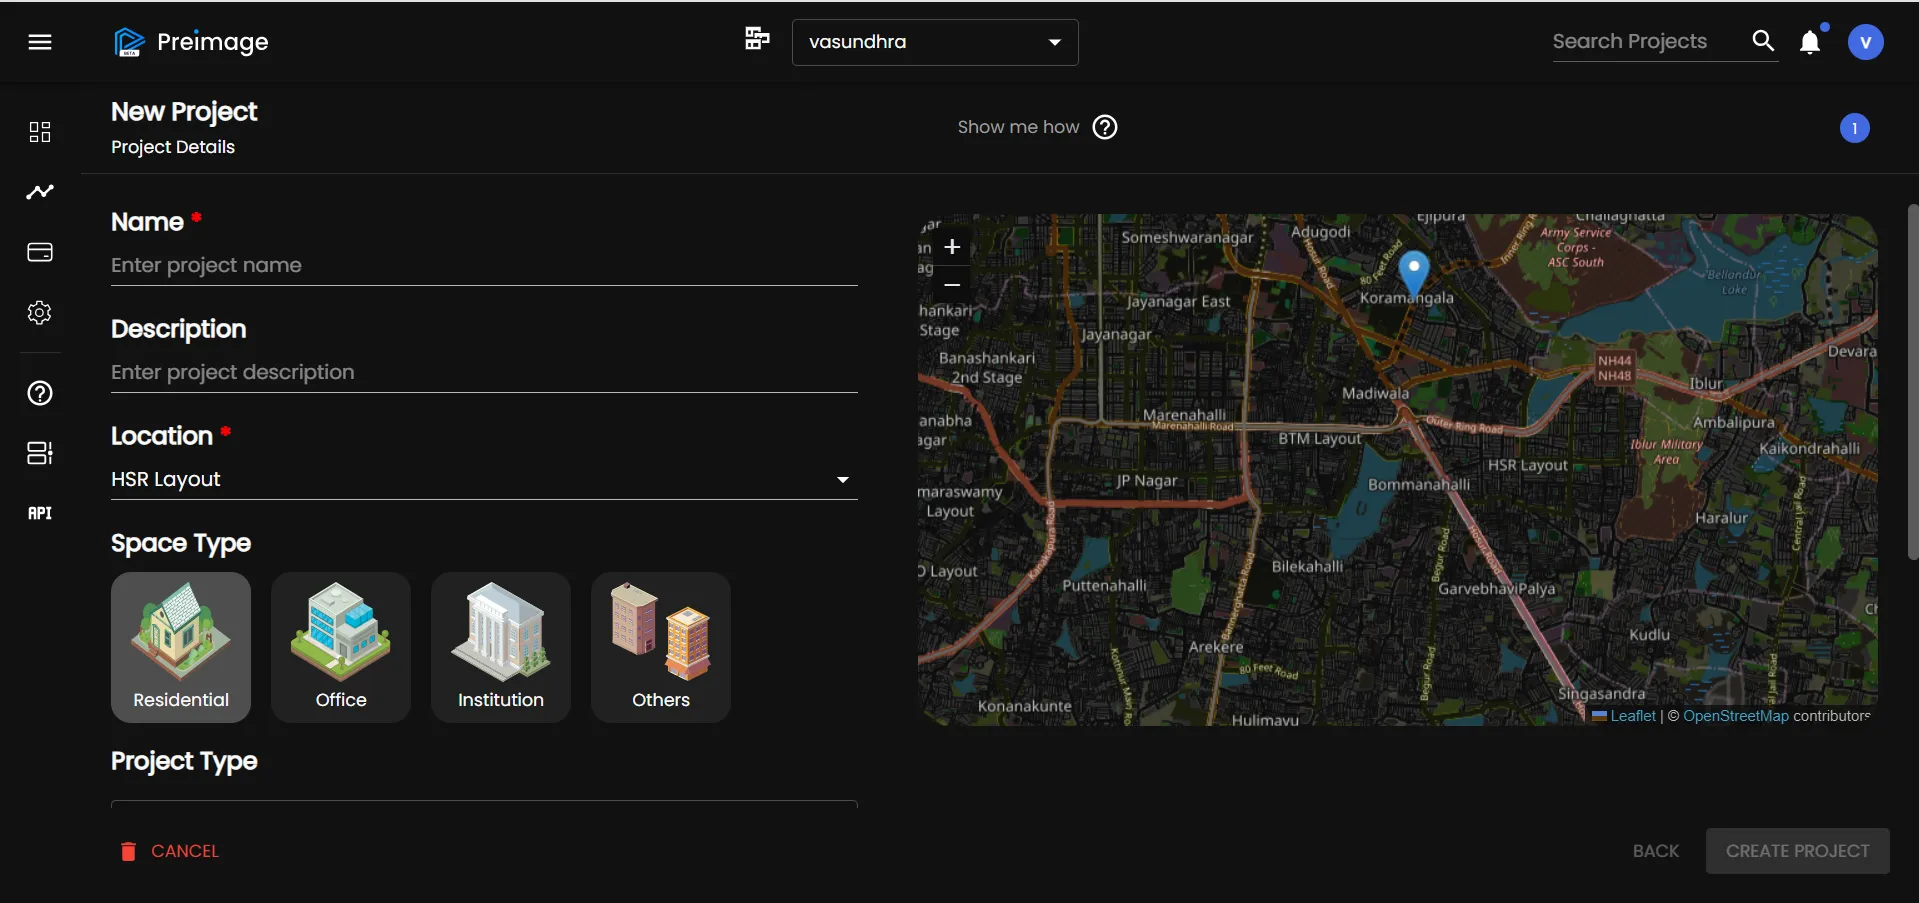
Input the following fields to define your project:
-
Project Name
-
Description
-
Location
-
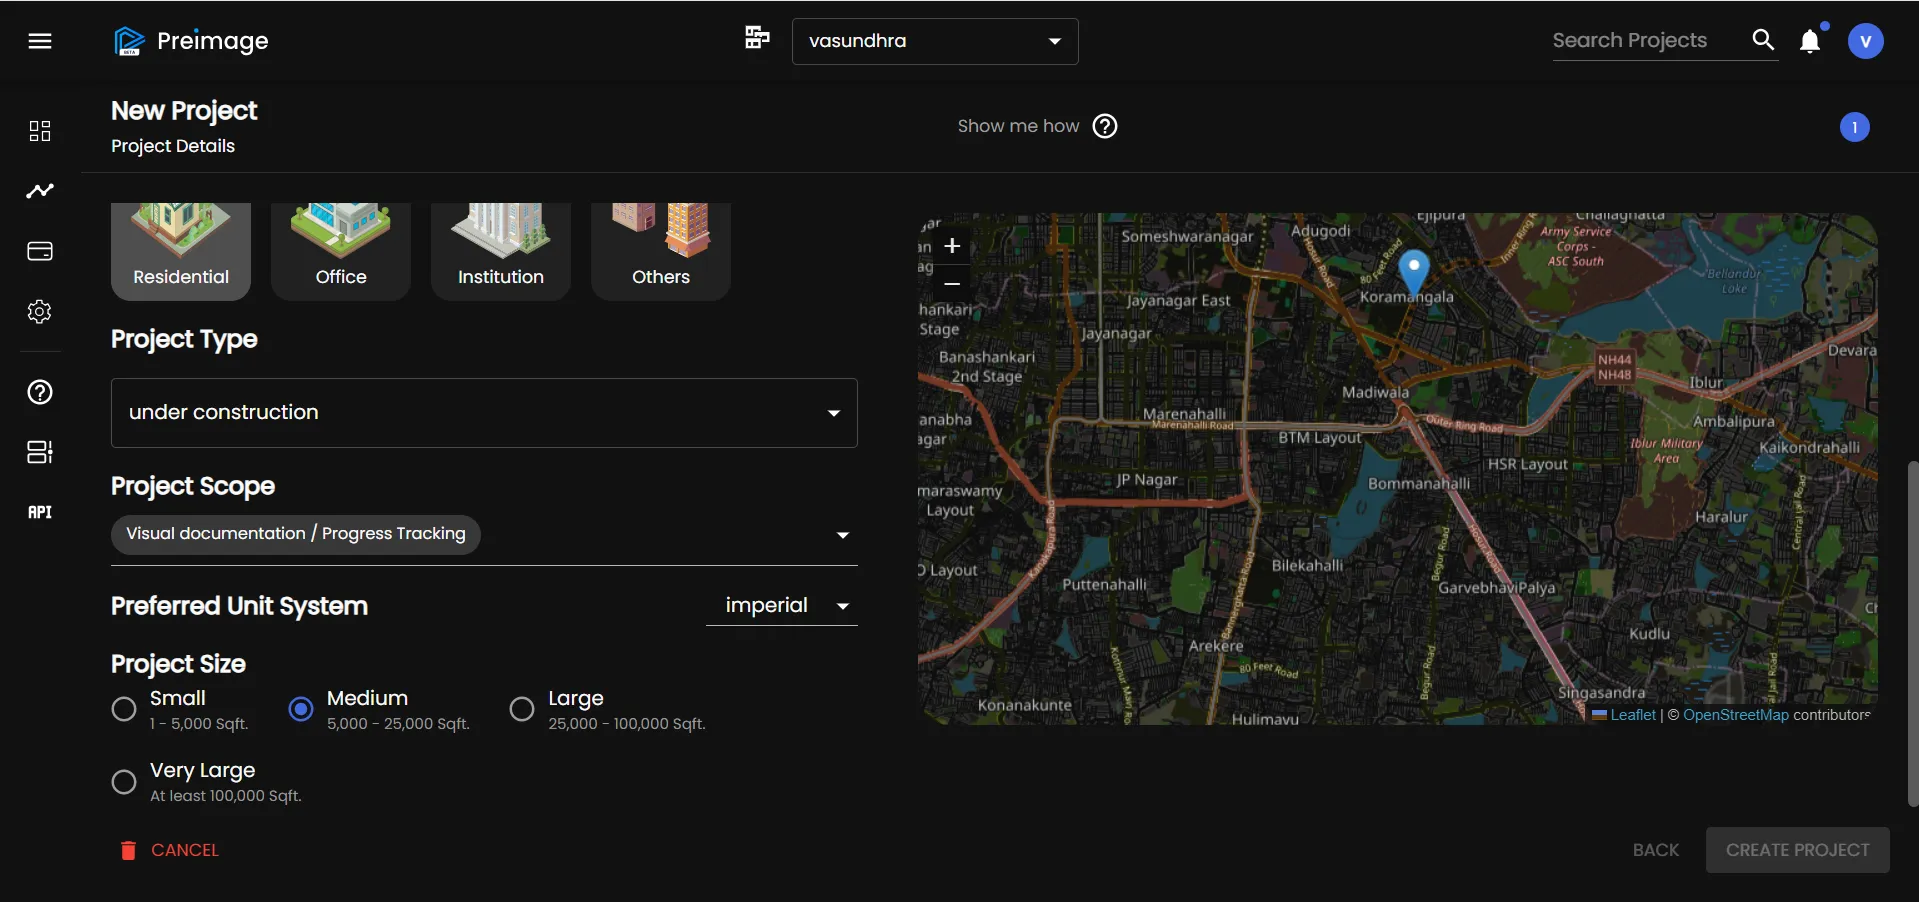
Project Type (e.g., renovation, new build, documentation)
-
Project Scope (e.g., interior only, full site, façade scan)
-
Space Types (e.g., residential, commercial, warehouse)
-
Preferred Unit System (metric or imperial)
-
Project Size (approximate square footage or area)
3. Upload Floorplans (Optional)
- If you already have floorplans, use the floorplan uploader for image, PDF, DWG, or DXF files. PDF upload uses the first page; prepare the required page separately if needed.
- These will help with alignment and comparison tools later.
4. Click “Create Project”
- Once all necessary details are added, hit the Create Project button.
- Your project is now live and ready to receive scans.
What’s Next?
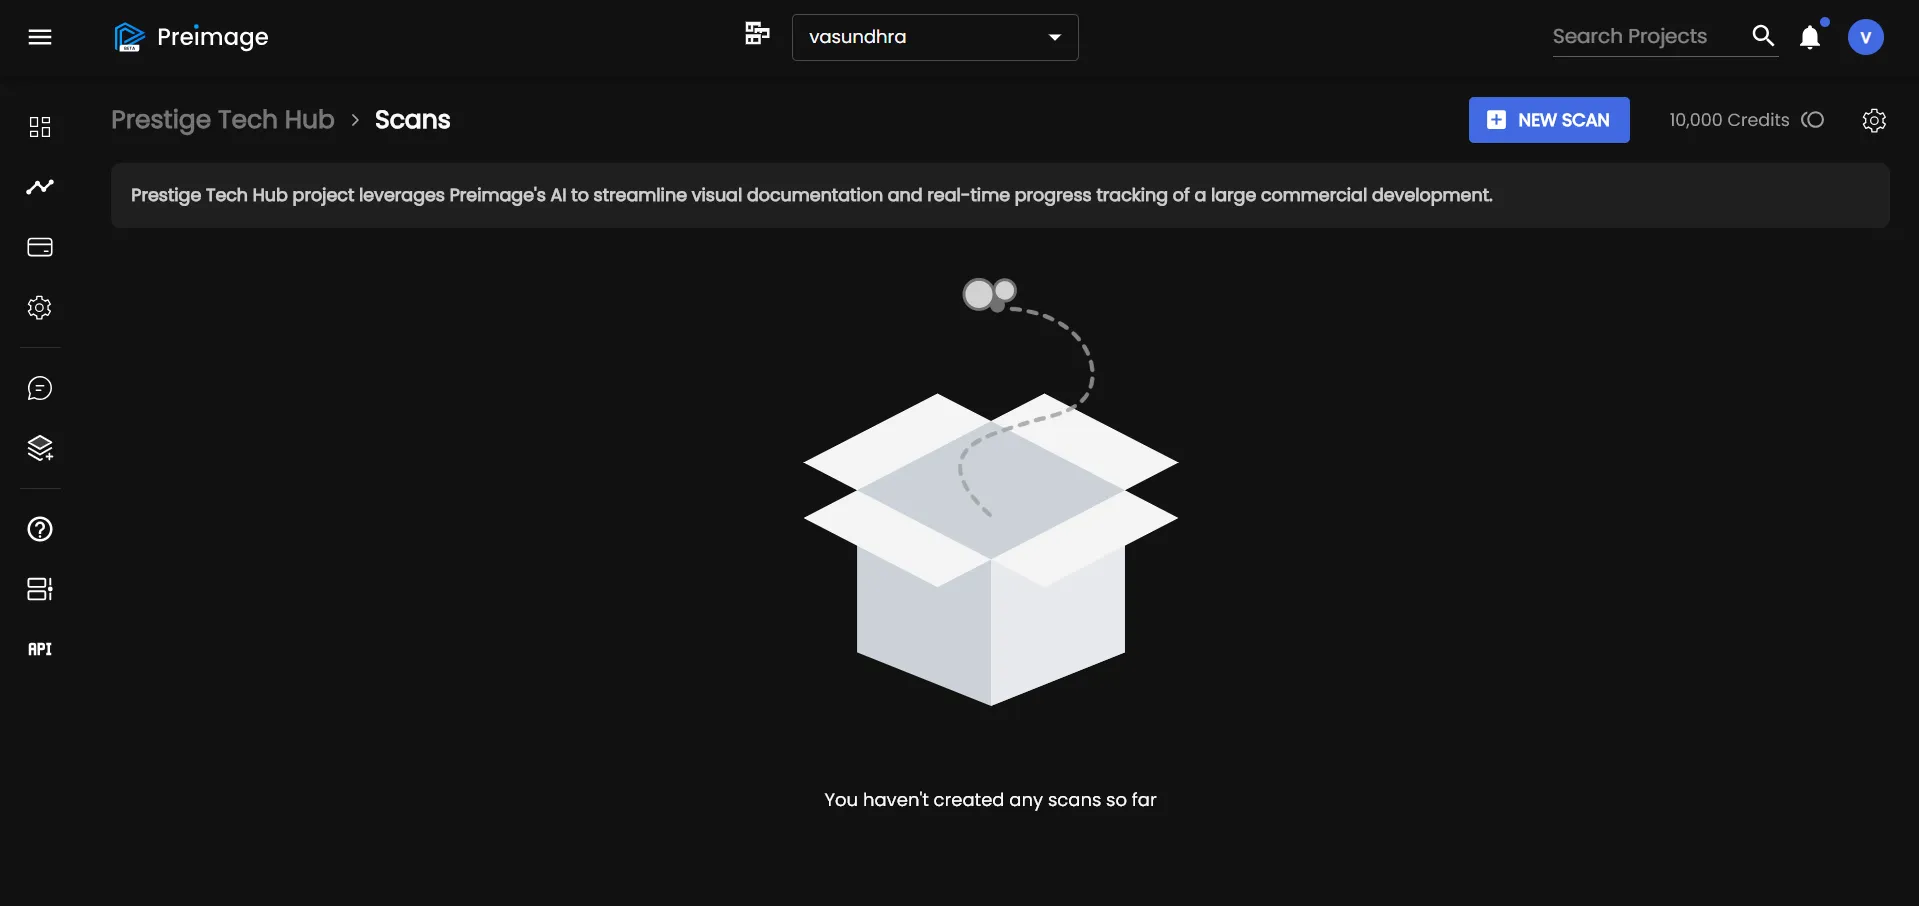
After your project is created, you’ll be prompted to add scans — such as 360 videos, drone images, or LiDAR point clouds.
Pro Tips
- Organize your projects around real-world sites, especially if you manage multiple buildings or properties.
- Use clear and consistent naming conventions to avoid confusion later.
- Use the correct floorplan revision and scale, then verify alignment and independent check measurements.